What is Meshtastic?
Meshtastic is an open-source project that allows you to use inexpensive LoRa (Long Range) radios to create a long-range, off-grid communication network. It offers several unique features, making it ideal for various situations requiring decentralized and resilient communication. It is a developing project with new features being added regularly.
LoRa uses a digital modulation called Chirp Spread Spectrum which allows for decoding signals well below the noise floor. This makes receivers ultra-sensitive which allows for long range communication at low power.
It is primarily a message posting service, with a public channel, and a number of private channels which you can create. The radio communications between the nodes are encrypted with AES256 encryption.
Scenarios
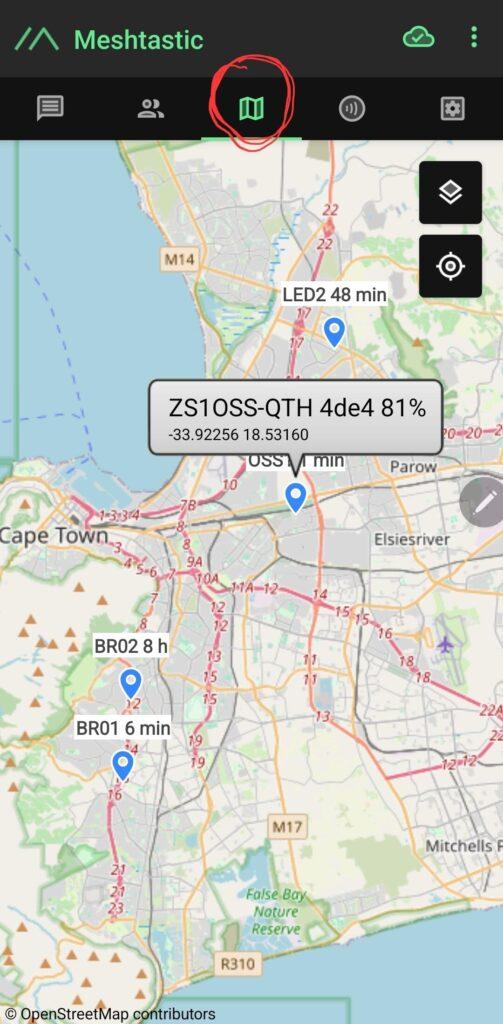
It takes only two connected nodes to be able to communicate directly with each other. If you are out hiking with three people who have battery powered Meshtastic devices, messages posted from one device can be relayed through the second device, and received by the third device. If the devices include GPS modules, then the range and direction of each node can be seen in the mobile app.
Another hiking/wilderness scenario is if a person ends up in distress, or goes missing, in a wilderness area, one of these devices will usually run a good 24 hours on its battery, and it can be picked up a good 30 km away with line of sight view e.g. from a helicopter that is trying to locate the person. A Meshtastic radio with a built in GPS (or using the phone’s location) can be spotted by the helicopter if they also have a Meshtastic radio, providing them with a direction and range of the target device. A cellphone ina remote area is not going to be able to phone the helicopter or communicate its location.
Telemetry data can also be transmitted across the network. Apart from weather, air quality, battery level, etc Meshtastic also provides a built-in “Generic Telemetry” feature designed for sending custom data over the mesh network. This could be used where Meshtastic devices are installed at traffic lights, for example, and could transmit backup battery State of Charge levels back to a central point. Or they could be used for water levels, diesel levels, or any other data that needs to be monitored remotely, or in remote areas where there is no network infrastructure.
It is ideal for disaster scenarios too, where a few Meshtastic nodes across a city, can keep residents in contact with each other when there is no Internet or cellular communications. A channel can also be made fully private, requiring a password to access it, and this is ideal if privacy needs to be ensured when dealing with injured patients etc.
In South Africa, with heavier stages of loadshedding from Stage 8 and above, we’ve seen many cell towers, and even Internet provision, losing their connectivity after two or three hours without grid power, leaving these areas without communications. In January 2024 a storm also left some towns in the Karoo without communications for nearly two weeks. With a town or city, all the Meshtastic nodes will keep vital messaging working. If just one Meshtastic node still has Internet access, it can have MQTT connectivity active which will enable messaging to and from a Meshtastic channel globally e.g. a Cape Town or a South Africa channel.
There is also integration with CalTopo / SARTopo desktop applications for sharing of APRS location data for rescue or similar operations. This just requires a laptop with the software, and a USB cable linked to the Meshtastic device. This gives a similar view to that which ham radio operators see with APRS location data on SARTrack.
Meshtastic also has an integration with the ATAK-CIV Android app (Android Team Awareness Kit – Civil Use). ATAK is an Android smartphone geospatial infrastructure and situational awareness app. It allows for precision targeting, surrounding land formation intelligence, situational awareness, navigation, and data sharing. This functionality is often used for coordinating public safety agencies during exercises, planned events or disasters.
What it is Not
Meshtastic is not a replacement for regular Internet messaging apps – It does not do file transfers, audio voice calls, or video. It is intended to be used where there is no Internet such as during disasters, prolonged electrical outages where cellphone tower communications have been lost, in wilderness areas when hiking or doing rescue work (two nodes with GPS can see each other’s direction and range from each other). It can also fulfil a type of role that CB radio used to, which is being able to make contacts and friends across your geographically local neighbourhood. It is also a great way to find new friends when travelling – go to a high area and see what nodes you can make contact with. It does also NOT provide any facility to browse Internet web sites or do e-mail.
All you need is a Meshtastic radio and your mobile phone (with Meshtastic app installed) with Bluetooth connectivity to the Meshtastic device. I know some of the antenna and cabling stuff below can sound a bit technical, but the other option is just buying a simple all-in-one ready-to-use device like the LilyGo T-Echo or the T-Deck (downside is the cost and importing).
You can also watch my non-technical introduction to Mesthtastic on YouTube.
Definitions
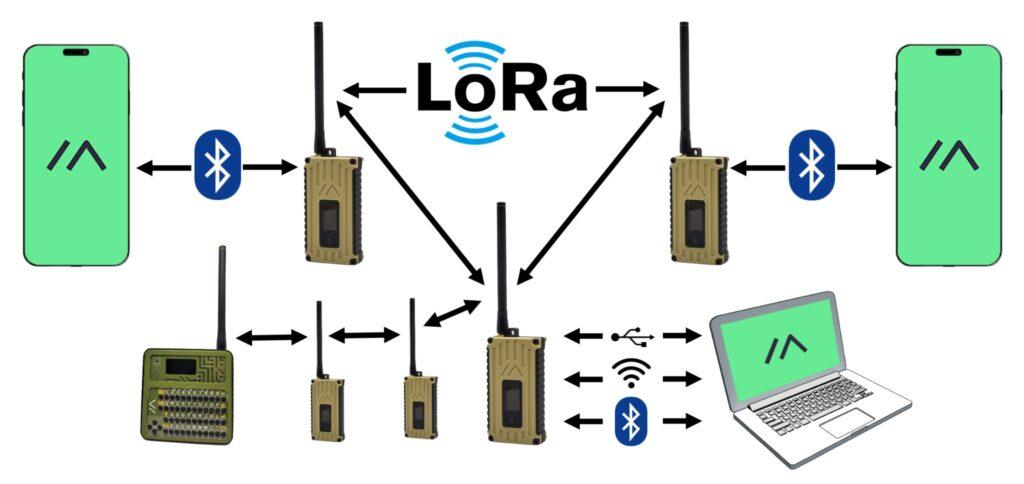
When you see mention of Meshtastic mesh, or mesh RF, referred to below, that is referring to the physical Meshtastic radio devices that are connected locally by radio to each other.
- A node is just an end device that has a radio connected to the mesh. Your Meshtastic radio is a node. Sometimes the word “peer” is also used to describe a node.
- “Mesh” means they interconnect with all other devices they can reach by radio, and they will forward messages onto other radios that can be reached through additional connected nodes. There is no central server or radio repeater used. Each node on a mesh is a repeater as well.
- You may also see the word “hops” used. To come back to the hiking example above, the connection from the message sender to the second hiker is one hop, and the relay from the second hiker on to the third one is another hop. Note that Meshtastic does not count the first direct link as a “hop”, it only counts from the subsequent “hop”. So, Meshtastic would show the hiking example as one hop to reach its destination (think of it counting the “extra” hops). A node defaults to just sending across 3 hops to find a destination, but this can be adjusted.
Key Features
- Mesh Networking: Devices relay messages for each other, extending the network’s reach beyond the range of individual radios. A few meshed nodes can stretch across a city, and even link up with nearby towns.
- Low Power Consumption: Ideal for battery-powered applications where minimizing energy usage is crucial. Most devices will work with a single Li-Ion 18650 battery for around 24 hours. Some of the smaller devices can run even longer with their lower power consumption.
- Long-Range Communication: LoRa technology enables communication over several kilometers in ideal conditions, depending on terrain and obstacles. The current record is just over 100 km.
- Offline Messaging: Some experimental modules, like Store & Forward, allow storing messages for offline delivery when recipients come back online.
- Peer-to-peer Communication: Messages are directly sent between devices, bypassing centralized servers. Because these frequencies are line of sight only, additional peers nearby will help messages reach around hills and other obstacles.
- Open-source and Community-driven: Offers flexibility and customization, with a vibrant community contributing to its development.
- No Radio License Required: The 868 MHz band in South Africa is free to use at this low power output. Anyone can use this.
BBS and E-Mail
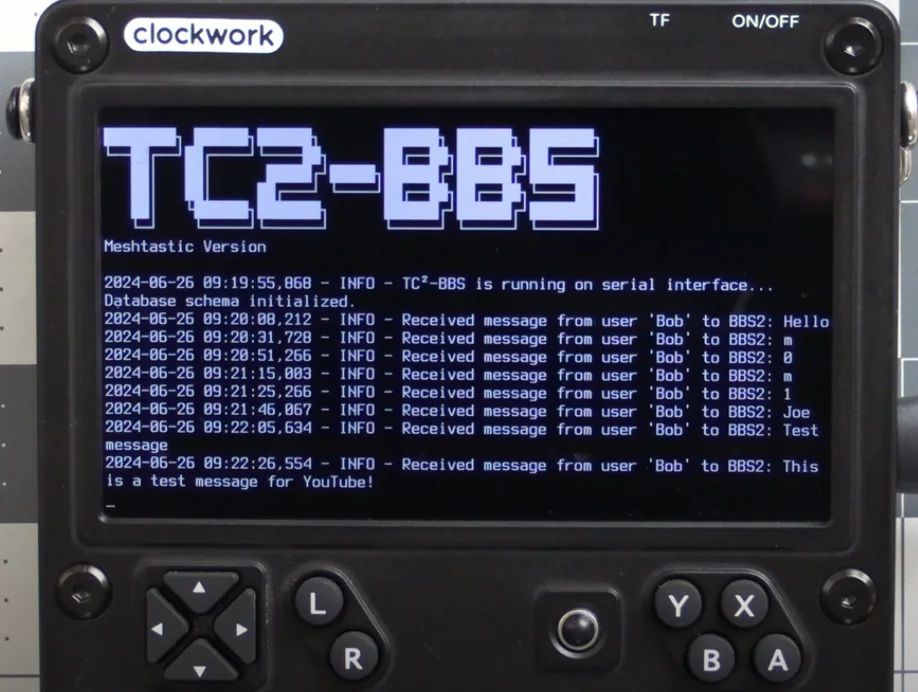
Whilst this functionality is not built into the standard Meshtastic software, it is possible to run 3rd party software on a Rapberry Pi (or similar) computer attched to the Meshtastic radio. This can then provide basic bulletin board and e-mail functionality. There is a good video overview at https://youtu.be/d6LhY4HoimU?si=lr8irxvzqBRVtxNO showing how will work.
The Meshtastic Store and Forward function does provide basic storage and forwarding of short text messages for nodes that are out of range, so one must weigh up whether that is sufficient or not.
Getting Going
You’d buy an inexpensive Meshtastic compliant hardware device (best to choose from the recommended hardware, and always ensure it states that it contains the SX1262 radio. Do not buy the older T-Beam v.0.7 or V1.1). Some portable versions of the hardware come in a palm sized case that already contains an antenna and a battery. For home use you may want to get an external 868 MHz antenna, and power the device using USB power. An example of cost is a Heltec V3 with SX1262 radio and it’s mini-antenna costs about R515 in South Africa (no case, no battery).
For South Africans (and other Region 1 users e.g. the EU) there are two frequencies that can be used:
1. 868 MHz is license free so anyone can use it without requiring an amateur radio or other license, and is dedicated to LoRa network. Transmission power is limited to a max of 100 mW (+27 dBm ERP). This choice is the most popular one.
2. 433 MHz for this purpose is license-free but is in use for other purposes as well, and you are limited to only around 10 mW (+10 dBm ERP). A licensed ham can lift the power limit in the software if is_licensed is set to true (but encryption is then disabled, and you need to set your ham radio callsign too). The biggest downside is this frequency is not in broad use in South Africa for Meshtastic.
Connect the antenna before applying any power to the device (battery or USB power). The radio can be quickly damaged if no antenna is connected when powered on.
Devices are powered by either a USB-C cable or with a 18650 Li-Ion battery.
Flash the Meshtastic firmware to the device. Tick the option to do a full erase and install on the first flash, otherwise you’ll find the web interface does not display properly from a web browser. This video will also help explain flashing to various devices. Updates don’t work between major versions either, and you must do a full reinstallation. You can us ethe mobile app to export settings, and then import them after the upgrade.
Install the Meshtastic mobile app on your Android or iOS phone. You use the app to connect through the Meshtastic device (much like you’d use the WhatsApp, Telegram or Signal messaging apps).
Connect the mobile app via USB-Serial, Bluetooth or Wi-Fi to the device. You can now configure the Meshtastic settings using the app (or web interface for the device by going to its IP address in a browser).
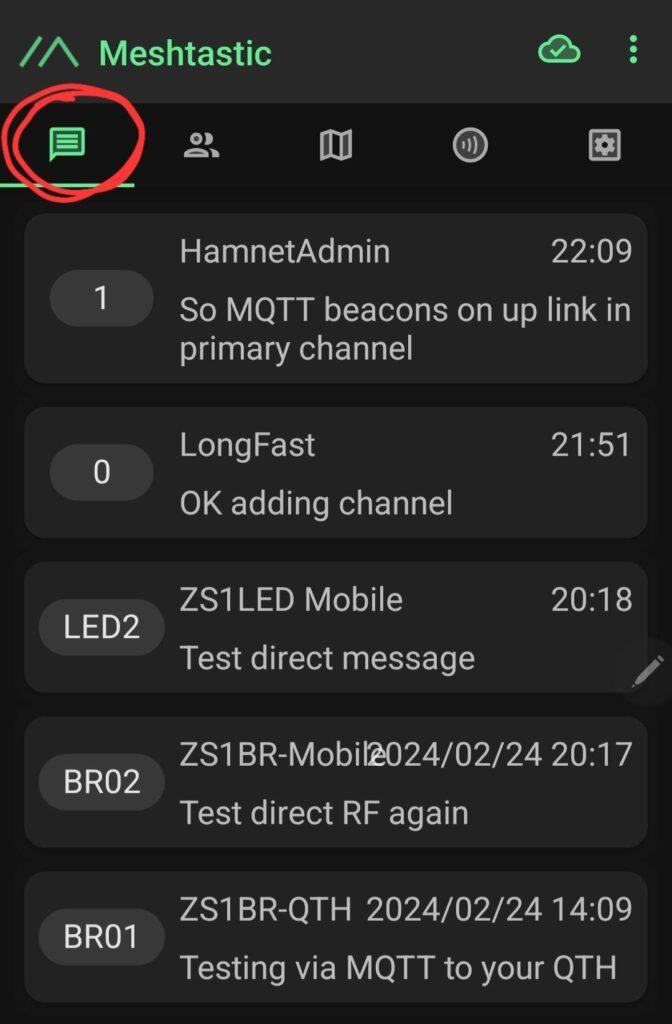
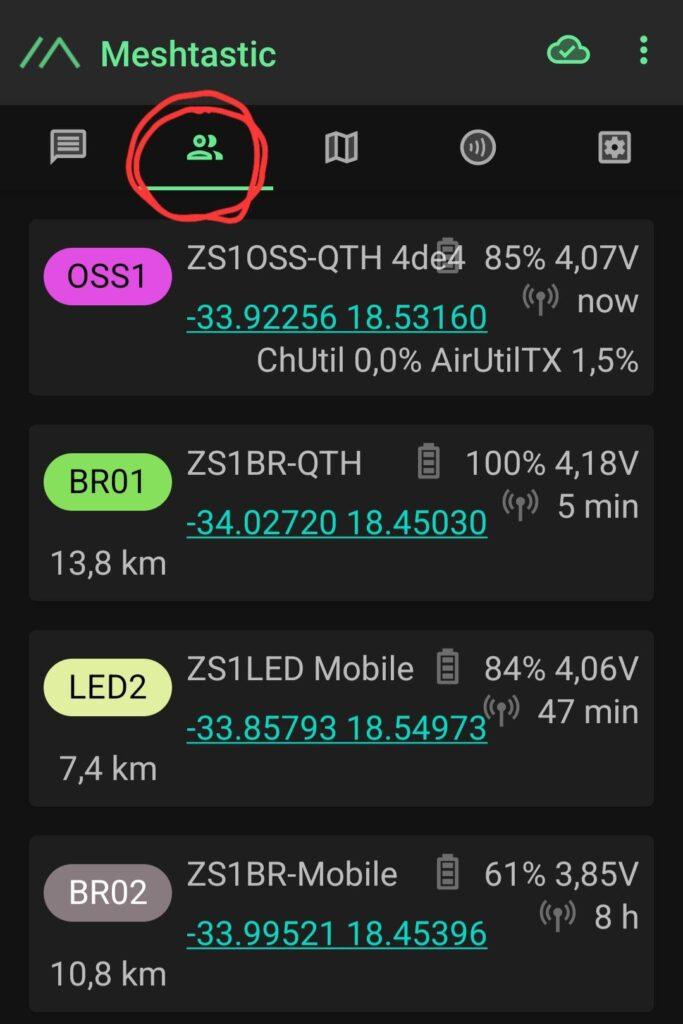
Use the mobile app to see what other nodes are reachable, as well as for sending/reading text messages.
Text message posts happen inside channels, and there is AES256 encryption between the different nodes which relay the messages. The LongFast channel is an open one which talks to everyone, a bit like calling CQ over the radio, or calling on CB radio’s Channel 19. You can also create your own private channels and set a password to join them – posts in these channels will only be seen by others who can join the channel. Clicking/pressing on a peer (another visible radio node) will also give the option to send a direct message. These direct messages are routed via the radio, and through additional peers that may be between you and the destination station.
Where can you buy Meshtastic hardware in South Africa?
South Africa has a major handicap when it comes to buying locally, unlike the EU or the USA, where lots of options are available. There are very limited options locally so I’ll list some options that may help you to get going. But otherwise, Amazon, LilyGo, or AliExpress (Be wary of ordering more expensive items from AliExpress as they invariably end up at the SA Post Office, and there is a good chance they go missing) are going to be your friends, along with the wait times and additional shipping costs. Right now, in early 2024, there is a global shortage of Meshtastic hardware as the surge in demand has depleted stocks.
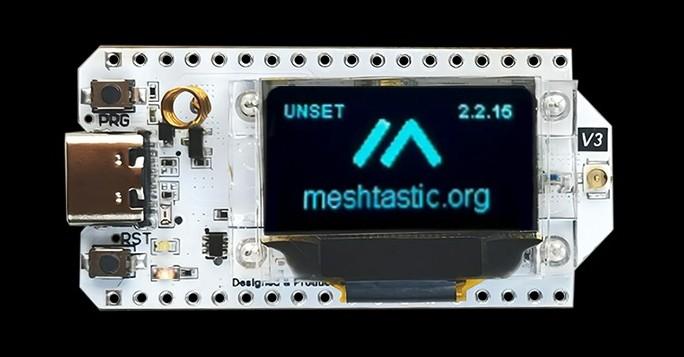
Micro Robotics (Online, Stellenbosch, Centurion) – for 868 MHz antennas, IPEX to SMA antenna pigtails (check whether you need male or female for your specific antenna), Heltec ESP32 S3 LORA 868Mhz Module V3 (about R515 without GPS or screen), generic cases, LMR400 coax. Note regarding GPS that the Meshtastic mobile app can also send the phone’s GPS location via the radio, so a built-in GPS is not essential if you have the mobile app connected.
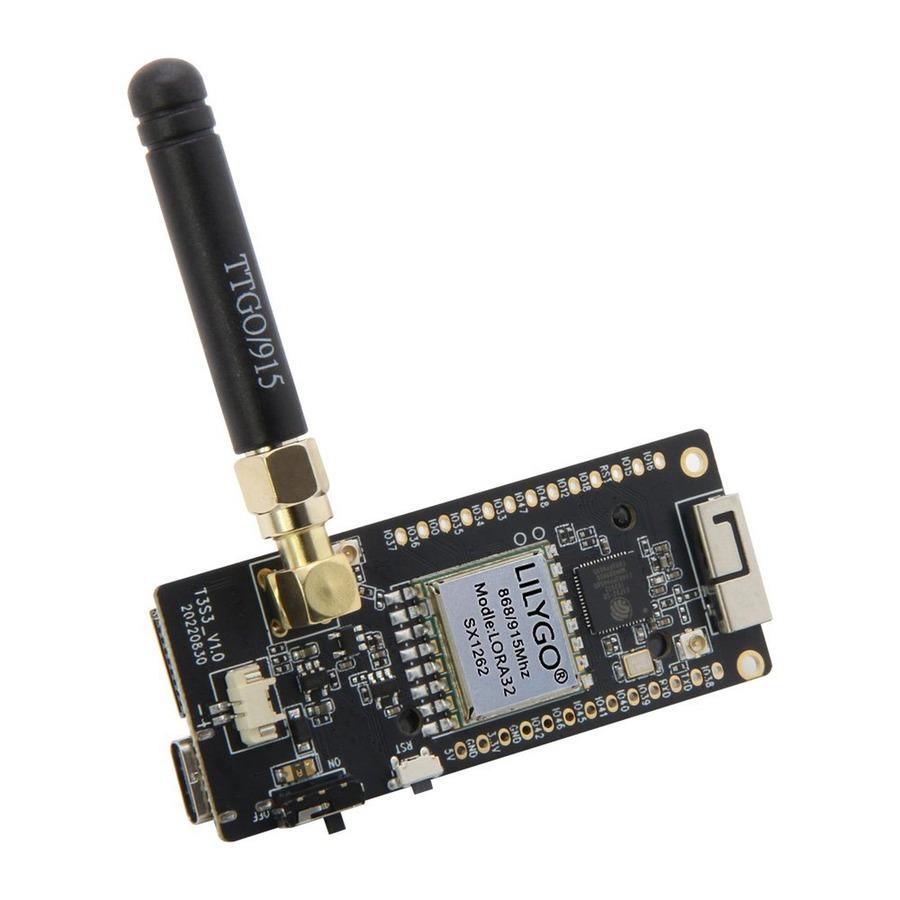
Communica (Online, Centurion, Pretoria, Cape Town) – TTGO LORA32 868MHz SX1276 ESP32 OLED Display Bluetooth Wi-Fi LORA Development Module Board (about R590, but SX1276 is not as good as the SX1262 radio). They also have IPEX to SMA antenna pigtails and generic cases.
RS Online – 868 MHz antennas.
PiShop for SX1262 LoRa HAT for Raspberry Pi, external antennas, TTGO T-Beam (but with SX1276 radio)
DIY Electronics – had 868 MHz antenna
There is also a South African channel on the Meshtastic Discord server where you can reach other South Africans using Meshtastic.
Typical Parts List
- Meshtashic device:
- LilyGo T-Beam
- Heltec V3 if you can import this is an option with a case and screen
- LilyGo T-Deck has screen and QWERTY keyboard
- LilyGo T-Echo is portable with case (should all state SX1262)
- LilyGo T-Watch-S3
- RAK Wireless WisBlock is a modular device with optional Ethernet capability, solar charger capability, POE, GPS, etc. This device can also have firmware flashed via the Ethernet cable (instead of normally via the USB-C cable)
- Case – if you cannot get a made-to-fit one and your device comes without a case, you may want to consider a generic plastic case which you can drill holes to hold the antenna, thread power through, etc. Etsy is one good online source to possibly find cases. Some 3D designs can be bought online, if you have access to a 3D printer.
- 868 MHz antenna – some devices do come with a small stubby antenna which is good for mobile use, but you get 10 cm bendy ones, then 110cm or 150 cm external ones too (remember to put weatherproof tape around the coax connector if you put the antenna outside – stretch the tape first to activate it). An external antenna will likely also require a 10cm or so pigtail to connect the antenna to the device. On the Meshtastic device side it is an IPX or IPEX connector. Pay attention to the male/female connectors as an SMA antenna with a male connector, needs a pigtail with a SMA female (or SMA-RP) connector to connect to it.
- LMR400 Coax – if you want the device to be near you, with the antenna outside or in the roof. LMR400 coax has a much lower signal loss than RG58 at this frequency (LMR400 is around ≤0.126dB per metre @ 868Mhz and bear in mind these devices only put out about 21 to 25 dBm). You’ll also need a pigtail adaptor with N connector (depending on what antenna you have) possibly to IPEX. 3m or 5m is usually a good length as these radios have weak signals so longer lengths of coax are not recommended. LMR400 coax is stiffer than RG58 so do not try and bend it as 90 degree angles. RF400 is possibly a suitable alternative to LMR400 for this use too.
- USB-C power cable or 18650 Li-Ion Battery – you can use a battery, with a separate battery holder if one is not included on the rear side of the device already. Most of these devices manage the charging of such batteries automatically.
Because these are mesh radio devices you may even just get away with using a small portable version. If you have a neighbour less than a kilometre away with a Meshastic device, all you need to be able to do, is to reach their node, and they will relay your messages further. One neighbour with a slightly higher location or antenna, can help many others get connected around them. Or if you have set up a device in your roof, you can use a smaller mobile Meshtastic device to work through (relay) your static one in the roof.
My Actual Parts List
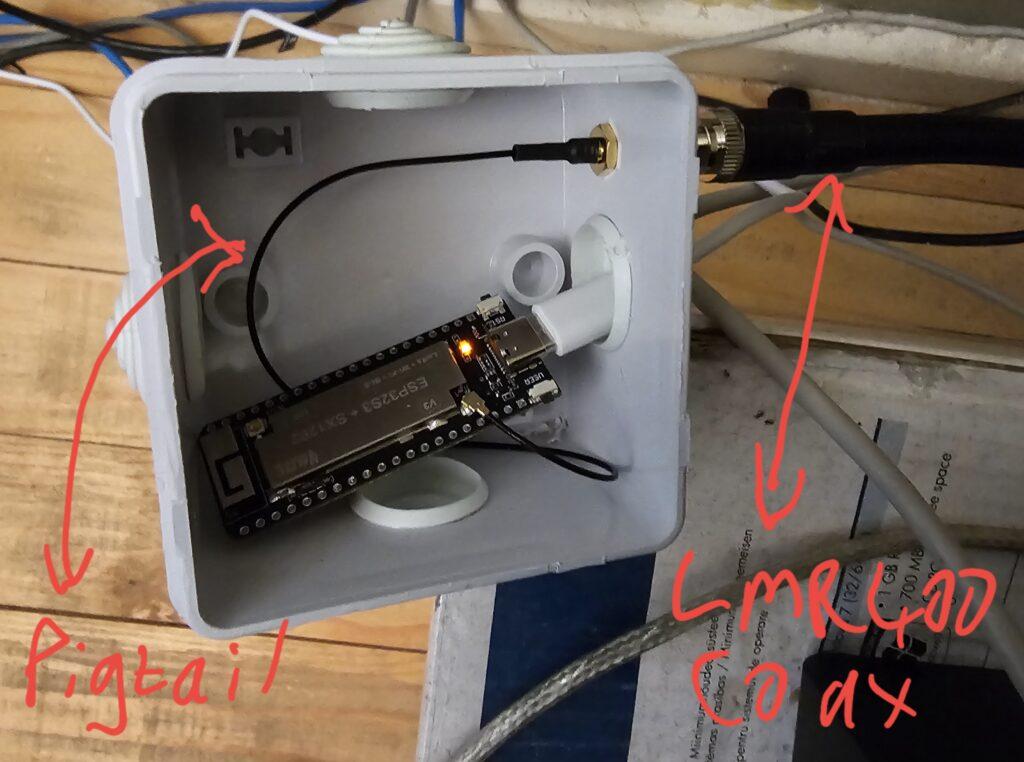
For the above these are the following parts I used:
- Generic case from Communica = about R50
- Heltec Wireless Stick Lite ESP32 S3 LORA 868Mhz Module V3 = R515.20
- Coax – LMR400 N Female to RP-SMA Male RF Cable – 5M (note SMA side is female actually) = R446.20
- Pigtail – SMA to UFL Adapter Cable (note SMA Male) = R20.70
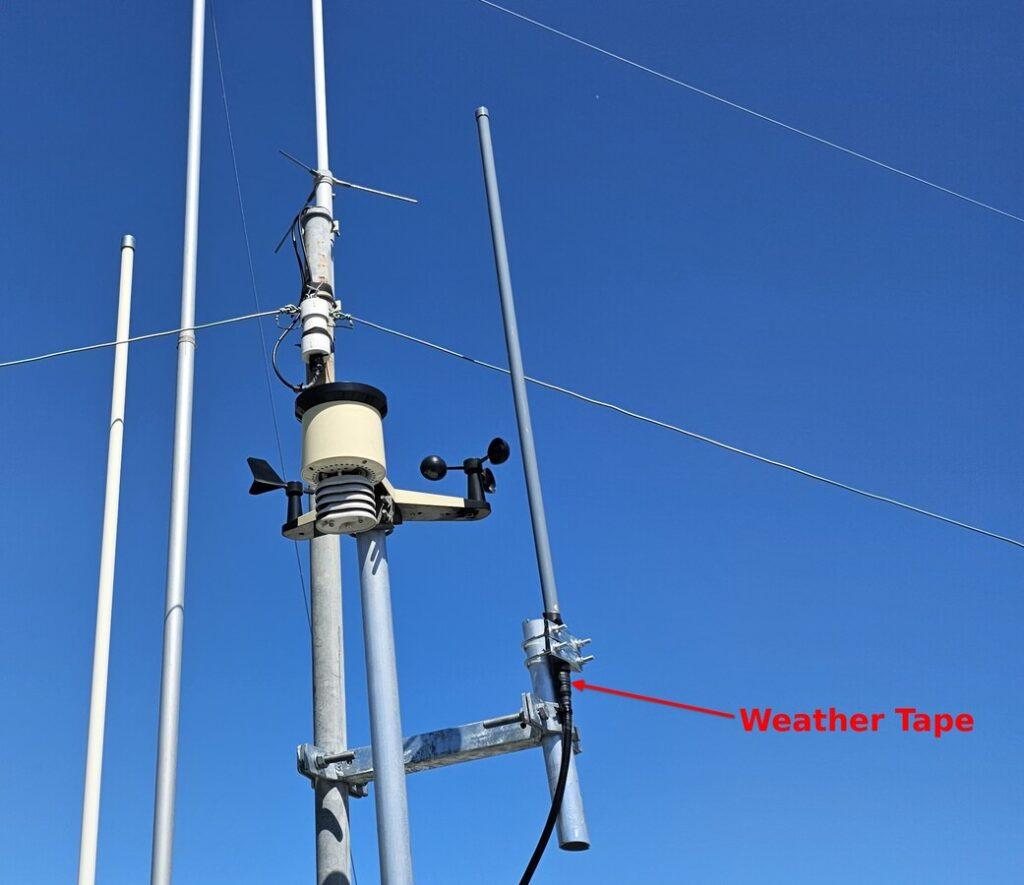
For the antenna these are the parts I used (but note again, you can also just use a stubby or a 10cm flex antenna screwed straight onto the SMA connector on the case):
- Antenna – Yetnorson Fiberglass Antenna 868Mhz 8dBi – 110cm for R615.25
- Clamp – Parallel Clamp 300mm for R430.00
- Weatherproof Tape – Sellotape Self Fusing Tape – Black (3000 x 18 x 52mm) R59.00
LilyGo T-Echo Radio
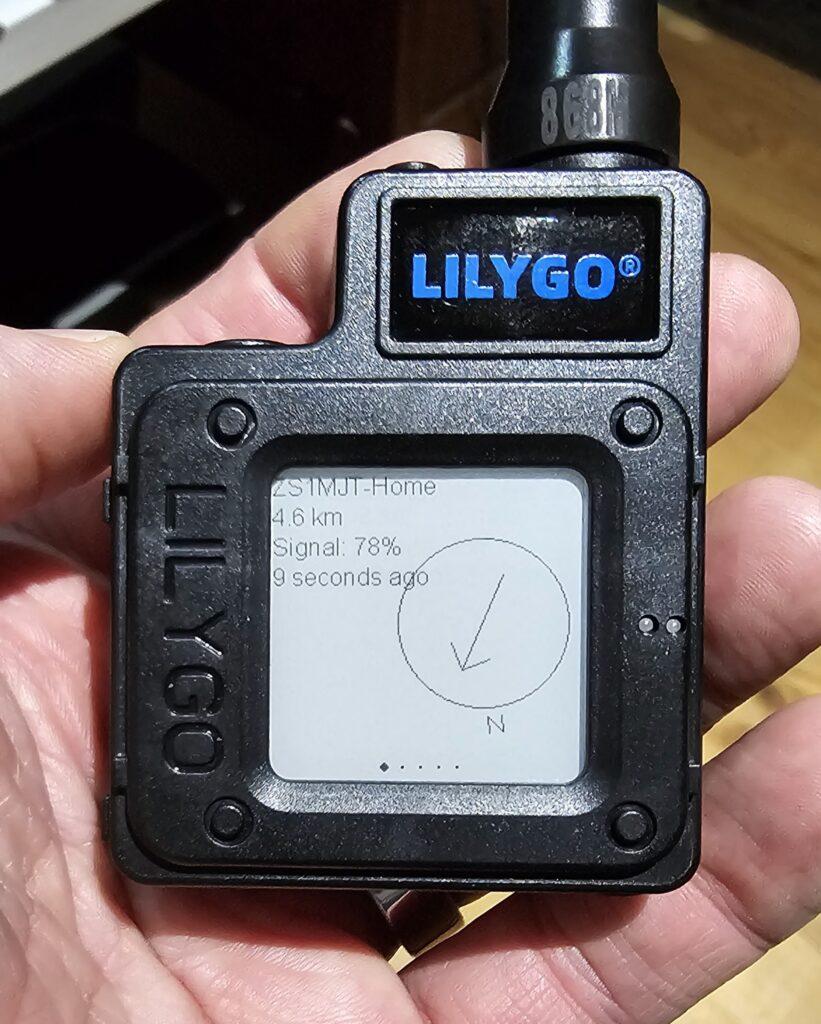
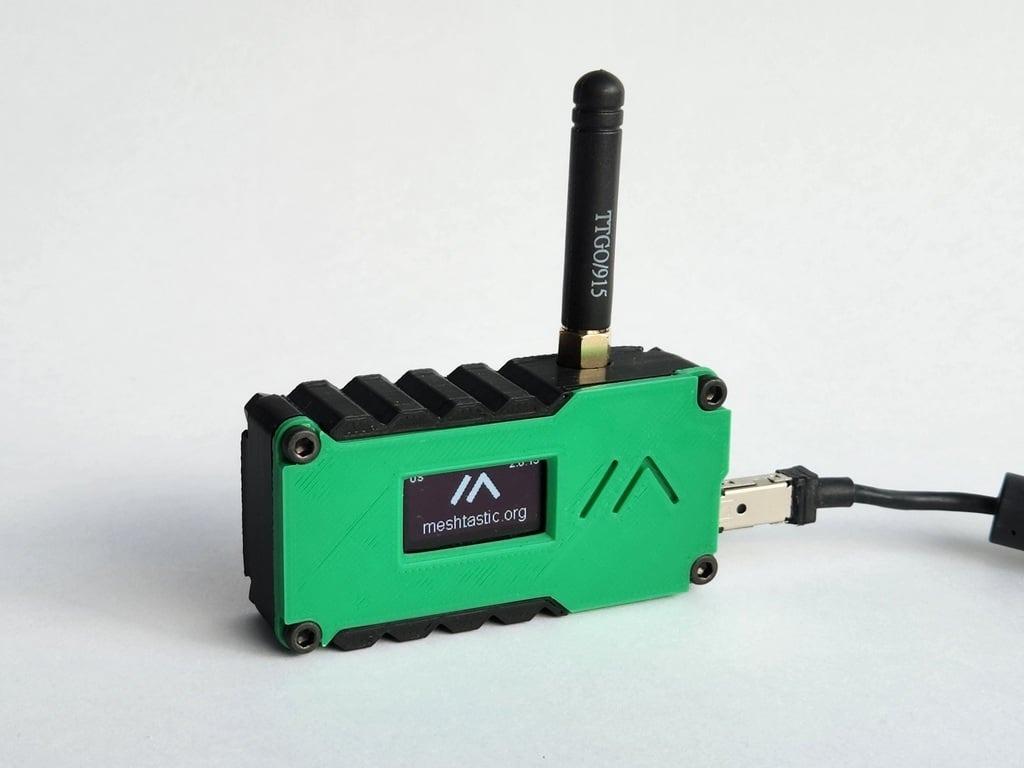
Above is my LilyGo T-Echo radio – this cost just over R1,300 (about US$70) to import from LilyGo inc shipping to the door. It is all self contained with a case, GPS, battery, display and antenna. All you have to do is power it up, open the Meshtastic app on your phone, and connect to it with Bluetooth. The e-ink screen is very light on battery use but at least shows what nearby nodes you are connected to, as well as any incoming message (all can also be seen in the phone app).
To update its firmware, you just connect it with its USB cable to your PC, press button 2 twice to get it to mount as a USB drive, then drag-and-drop the firmware file across the device. It reboots, and it is updated.
Situation in Cape Town
As mentioned above it just takes just a few Meshtastic nodes with better reach to cover larger areas, and get more people connected, even though the other users may be using smaller devices with the stubby antennas. Higher sites like Newlands, Plattekloof, etc will provide great range, and will help act as a relay between two nodes that cannot see each other directly be line of sight.
Many people are disillusioned when they turn on their device to find no-one they can connect to. A few HAMNET radio amateurs in Cape Town have now bought Meshtastic devices and are establishing some nodes across Cape Town. Hopefully this will provide some momentum if others can see nodes they can connect to. Many larger cities in the USA and Europe have got good coverage already with 100’s of devices, and they don’t have all the communications challenges that South Africa has with load shedding. There was also a Meshtastic network working in Kyiv in The Ukraine with a gateway to the Telegram messenger service. Individual low-power nodes are very difficult to track down.
There is also now a Discord group dedicated to Meshtastic in South Africa, which you could join to find out who else is active nearby.
The idea is to use all these meshed nodes to keep messaging communications working across the City, even if pockets experience communications blackouts. We are hoping to also get our City and Provincial Disaster Risk Management agencies on board too. The plan would be to have a Meshtastic channel configured for Cape Town only, and to connect that with MQTT to the Internet. If one or more nodes are publishing this channel’s messages to the Internet, it will mean that Disaster Management can monitor the communications to see where assistance is required, or where water tankers need to be deployed to, etc.
With the involvement of radio amateurs, they in turn also have radios which can be easily used to reach other South African cities. or even internationally. Meshtastic devices will allow all users within a neighbourhood to stay in contact with each other, and the theory is that participating neighbourhood watch members and radio amateurs close by, can be contacted if needed.
And of course, just building social relationships with your own neighbours, businesses, etc is also always a good and fun thing to do too.
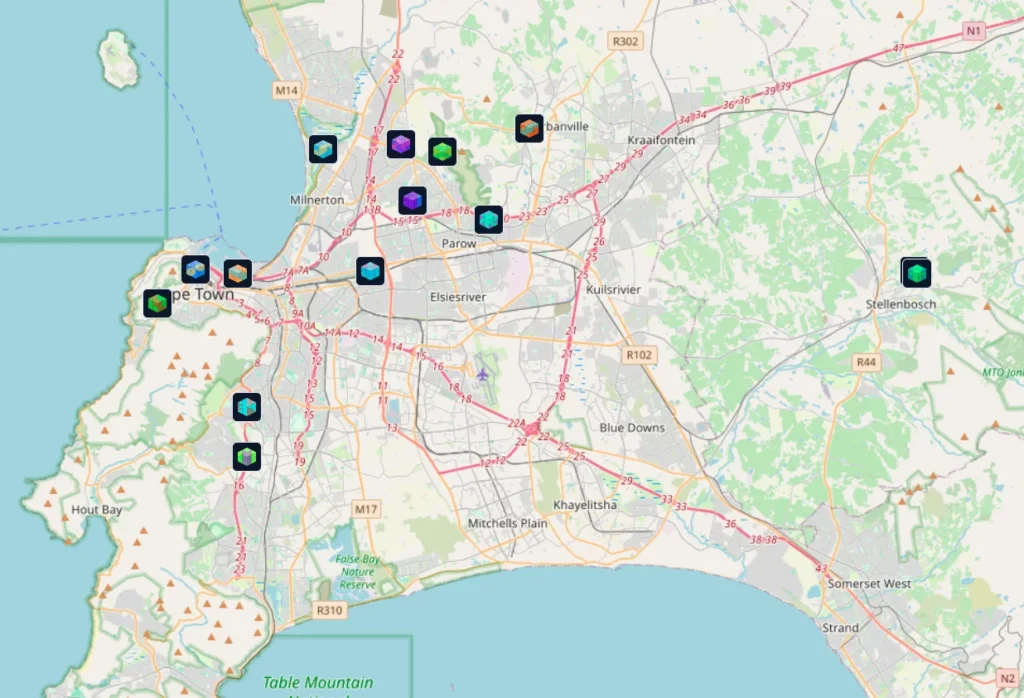
Cape Town has doubled its number of nodes from 5 to 10 in March 2024. Many locations have two devices (a home and a mobile device).
By 6 June 2024 my home node shows about 13 nodes in radio contact (via a hop or 2) and the node databse showed about 25 nodes seen at some point ove rthe previous 2 weeks. The map below is a snapshot from 6 June 2024 showing the nodes my home radio is seeing across Cape Town. The one in Stellenbosch is doing a 44km hop via another high site.
Some of the discussion below is very technical, but the plan is to simplify it into some basic configuration steps, and to produce some 5-minute videos showing how to configure the key settings for use in Cape Town.
When it becomes Busy
We’re a way from this still in Cape Town, but when we do have a lot of nodes, this type of network can become congested with beaconing, telemetry, etc as everything uses the same frequency. In the early stages it’s fine to beacon regularly as nodes need to find each other, and others need to see what is available where.
But at some point it will be wise to tweak some settings to reduce the network traffic, especially if we see messages are not getting through reliably:
* Settings/Device Config/Rebroadcast node: 900 secs (15 mins) for quiet area, 1800 secs (30 mins) for busy area, 18000 secs (5 hours) for congested area. Traffic passing through your node will still make your node known.
* Settings/LoRa Config/Hop limit: Default is 3 but if you have set it to the maximum of 7, every node 7 hops away is replying to you with a packet to acknowledge. Even on 3 your node will try find the most effective path, through nodes with a low RSSI, to reach a further node.
* Using Traceroute does involve each radio along the route, so use it rather only when you’re checking a faraway radio as a special circumstance.
* Don’t spam the LongFast channel repeatedly with the same test message. Give it a chance to be delivered first.
* ChanUtil percentage for your node indicates how busy that channel is. 25-30% is fine, but over 50% is indicating it is starting to get congested.
MQTT
The MQTT protocol (just like a protocol that connects e-mail, or connects a phone to a cell tower) bridges different mesh networks via a common MQTT broker/server on Internet. See https://meshtastic.org/docs/software/integrations/mqtt/. A Meshtastic device connects through a Wi-Fi network it has access too, or via the Phone app that it is connected with, to a Meshtastic MQTT server/broker on the Internet. You can think of that MQTT server/broker as a service that synchronises messages between two or more different Meshtastic mesh networks, for a particular channel that the users have subscribed to.
It is much the same as a WhatsApp/Telegram group that you have subscribed to, and no matter who posts a message in that group, the WhatsApp/Telegram server (like a MQTT server/broker) synchronises the group so that everyone sees the message and any replies posted to it. Meshtastic goes a step further, if the downlink is enabled for the channel, then that node will rebroadcast messages and replies over the Meshtastic mesh locally for others to read in the channel, even if they do not have MQTT enabled, or don’t have Internet access. So, everyone does not need to enable MQTT on their devices.
Using the MQTT root (top level / global) topic msh/ and having a busy global channel like LongFast with downlink enabled, is NOT a good idea as it will flood the mesh radio network (which is a slow network).
If the default root topic is used then the device will publish its MQTT state as online/offline to ‘msh/2/stat/USERID‘ where USERID is node ID of the device connecting to MQTT.
For each channel where uplink/downlink is enabled, a topic will also appear such as ‘msh/2/c/CHANNELNAME/USERID‘.
There are 3 places for MQTT configuration settings in the Meshtastic mobile app:
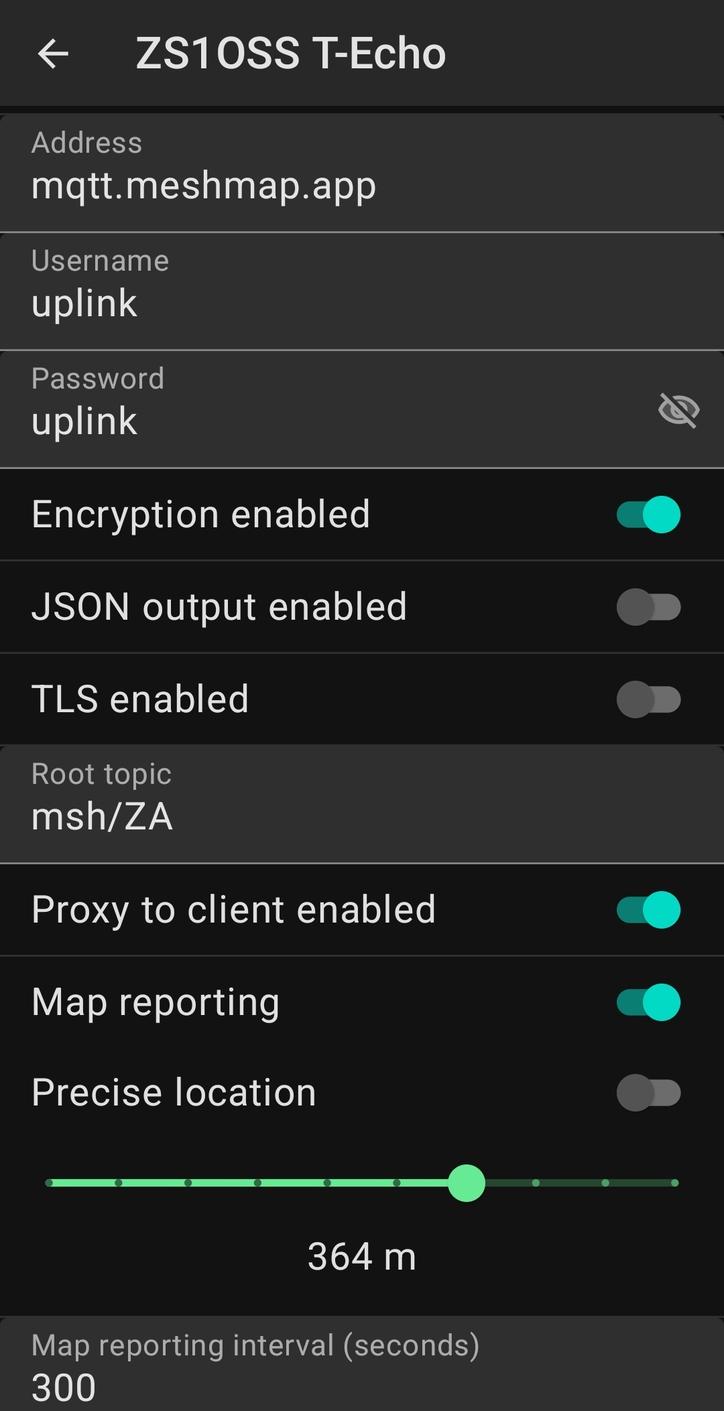
- Module MQTT – enable toggle (entirely disables/enables the MQTT module), and its config, encryption (if MQTT server supports it – the default official mqtt.meshtastic.org server can handle encrypted packets) but we are NOW using mqtt.meshmap.app with username uplink and password uplink, root topic (
msh/will show all MQTT subscribers globally, but using a custom sub-topic likemsh/ZAwill filter to just those that have set this topic), TLS (if server supports it), JSON enable (not encrypted – for external systems to use the data). The toggle for ‘Proxy to client enabled’ is to allow the device to send/receive packets over the web via the phone’s Internet connection (in other words, Network Wi-Fi is then not required). You can also togle Map reporting on if you want your device to show up on the maps. Note you should consider setting the location slider up to 200m or 300m to fuzz your exact location. - LoRa – ‘Ignore MQTT’ toggle: Setting this to option to ‘true’ means the device will ignore any messages it receives via LoRa that came via MQTT somewhere along the path towards the device (in other words that originated from MQTT and are broadcast over the mesh radio).
- Channel – per channel toggle MQTT Uplink and Downlink: This effects messages received via MQTT for that channel being sent out over mesh RF, and sending any mesh RF messages up to MQTT.
uplink_enabledwill tell the device to publish mesh packets to the MQTT broker/server (which also sends your location to the Meshtastic map, so disabling this toggles means you won’t be seen on the map).downlink_enabledwill tell the device to subscribe to all messages from the MQTT broker/server, and forward any packets from there onto the mesh radio network locally (disabling this will mean you won’t see channel messages via MQTT for this channel, nor will you see any peers advertised via MQTT on your mobile app). Having it enabled though for a busy MQTT channel (like msh/) can flood the local mesh radio network though.
So, if you want to work on mesh RF only being visible (only seeing actual radio nodes nearby with what is being sent from MQTT via the Internet to you), but still want to be seen on the map, then disable downlink and enable uplink in channel settings. Messages you post in the channel will still go to the MQTT broker/server, but you’ll only receive via mesh RF in the channel, and only see peer updates via mesh RF. If the receiving station has same settings, they won’t receive your message via MQTT, and only will receive via mesh RF if connected via mesh. A third party with downlink enabled on the channel, will be able to see both sides posting to the channel, even if they do not have mesh RF connection. [This paragraph is really for those who want to work purely using the mesh radio links around them]. Newer version of the Android app from v2.3.5 are now showing nodes with hop numbers and RSSI signal strengths for RF connections.
Channels
Think of them as chatrooms or group chats. Devices have a default primary channel preconfigured as channel 0, shown as #LongFast-I (Long range / Fast) with a default PSK as AQ==. Periodic broadcasts like position and telemetry are only sent over channel 0 (the primary channel). Uplink enabled (to MQTT) on this channel will also send your location to the mesh network, as well as the Meshtastic map.
You can also create a new Channel and share the details with your group. The group is private and only those who have the details can join the group and see the messages. A PSK encryption key can be set (and shared) with your group to keep that channel private. A 32-byte PSK key will create AES256 encryption for the channel. So, you can create a new channel and name it as your suburb or possibly the political Ward number. Any new user wanting access to the channel must have the identical channel name and PSK key set.
Changing the Channel name will break communications with your group, i.e. if you change your settings without sharing the new details with the group. Note also that you cannot have DISABLED channels in-between active channels such as PRIMARY and SECONDARY. Active channels must be consecutive.
Here is a good video giving some more detailed explanation about channels.
Measuring Signals
RSSI (Received Signal Strength Indicator) is a relative measurement that helps you determine if the received signal is strong enough to get a good wireless connection from the transmitter. Since LoRaWAN supports bi-directional communication, RSSI is an important measurement for both gateways and end devices. RSSI is measured in dBm and its value is a negative form. The closer the RSSI value is to zero, the received signal is stronger.
Apart from the output power of the transmitter, the following factors mainly influence the RSSI:
- Path loss
- Antenna gain
- Cable/connector loss
SNR (Signal-to-Noise Ratio), often written as S/N, is the ratio of the received signal power to the noise floor. SNR is commonly used to determine the quality of the received signal.
SNR can be calculated using the following formula and is often expressed in decibels (dB):
SNR (dB) = Preceived_signal (dBm) – Pnoise (dBm)
If the RSSI is above the noise floor, in other words above 0 dB, the receiver can easily demodulate the signal. A negative SNR means that the signal power is less than the noise power. If the RSSI is below the noise floor, it is impossible to demodulate the signal. However, LoRa can demodulate signals that are below the noise floor.
General Tips
- RG58 coax is unsuitable for this frequency and low power. At a minimum you will need LMR400 coax if you want to locate the external antenna maybe 5m away from the Meshtastic device. You’ll also need a pigtail adaptor cable to go with it to connect to the Meshtastic device. Check EVERY connector’s male and female side as I was already supplied two female connectors and that will not connect properly, and could damage your radio, as well as cost extra trips back to the shop. Note also with SMA connectors that there is a standard one (centre pin is male and outer conductor has a threaded exterior) and RP-SMA (centre pin is female socket and outer conductor has a threaded interior)).
- Make sure antennas are tuned for the 868 MHz band (they should state 868 MHz).
- Can also make your own DIY antenna (just 78.5 mm per element with heat shrink) – https://youtu.be/srV70ghBtHg?si=T5jclG0Ln5SdLxBW. Here is another video based on a quarter wave design for the US frequency, but he explains where to change the calculation to suit 868 MHz.
- Most of these boards use an IPX or U.FL antenna connector. These are also known under various other names such as IPEX, IPX, U.FL, U.FLX, MHF, AMC, UMCC, and MCRF. Note that an MMCX connector is not the same as an IPX/U.FL. Casual removal and insertions of U.FL connectors should be avoided even with the proper tool as the manufacturer’s stated total insertion/removal life is only 30 cycles. When it comes to manoeuvring the cable attached to a mated U.FL connector, extreme caution should be used. Acceptable torsion and bending forces on U.FL connectors are just as microscopic as their size, on the order of 2 N.
- The SX1262 radio covers wider frequency range, max data rate of 300 kbps, draws 6 mA, and up to 15km. The SX1276 is limited to 868 MHz, 100 kbps data rate, draws 5 mA, and about 10km. If it does not state SX1262 on the device then it does not contain a SX1262 radio.
- Avoid buying the older T-Beam v.0.7 or V1.1, or T-Beam with M8N GPS.
- The Heltec Wireless Stick Lite V3 has two antenna connectors. For LoRa you want to use the one closest to the USB-C power port. The device I bought in SA has no OLED screen. The other antenna connector is apparently for Wi-Fi, but the internal Wi-Fi antenna is usually good enough.
- You can show a web page for your device’s node if you run this service in a Docker container – https://github.com/meshtastic/web. Otherwise, you would use the address https://meshtastic.local/ on your local LAN if your device is connected to the Wi-Fi (or it’s actual IP address, especially if you have two or more devices). Note though the app has more functionality than the web interface.
- The ATAK plugin will allow tactical sharing of locations and a target – https://youtu.be/mb2OBIw-1Oc?si=hde4492Y1rzYoVPl
- Typical router hardware setup – https://youtu.be/yTbt20A5JdY?si=d2iEuCmK30Yky_Kv
- Availability of cases are a real problem in South Africa, and the only options seem to be buying from AliExpress, or some sites where you pay to get a 3D printing blueprint to print it yourself.
- Bluetooth vs Wi-Fi connectivity: The devices only work on one of these at a time. If both are enabled, it works on Wi-Fi (2.4 GHz only). But even if you are out of range for Wi-Fi, it will not switch over automatically to Bluetooth. There are two things you can try here:
- If one device is a dedicated mobile use device, and you take it out often, you can just leave Wi-Fi (under Network settings) disabled, and use the Bluetooth connectivity.
- If you have one device you must decide, but if you keep it with Wi-Fi enabled say in the home, you’ll need to remember to disable Wi-Fi before you leave home, before you lose your Wi-Fi connectivity (otherwise you’ll be out an about and won’t be able to connect to it via Bluetooth – not even rebooting the device seems to fall back to Bluetooth).
- Position: I’ve kept fixed location going with Smart position off [Note: I’m going to test leaving this on as all it does is adjust the beaconing timing based on whether the device is moving ort not]. When going mobile I just enabled the “Provide phone location to mesh” option, and that was updating the location. When I returned home, I disabled that sharing, but noted that it kept the position. It did not revert back to the fixed position I’d set earlier. It seems that it used the phone’s location to update the fixed location setting (need to verify this again).
- See Meshtastic nodes on a map – https://canvis.app/meshtastic-map or https://meshmap.net/ or https://map.technicallyrural.com/. For your device to appear on the map automatically, it needs Internet access via Wi-Fi or your phone, with uplink enabled on the default LongFast channel. Anothe rtgood map at https://meshtastic.liamcottle.net/ shows additional info about nodes such as battery history, nodes heard, traceroutes, etc.
- Line of site viewer at https://www.heywhatsthat.com/ or https://www.scadacore.com/tools/rf-path/rf-line-of-sight/. This frequency needs line of site to see other nodes, so hills and mountains will block the signal. These tools help you see whether there are any hills between various points, or some show the reach by line of sight.
- Getting started guide at https://meshtastic.letstalkthis.com/.
- Video guide to all mobile app radio config settings at https://youtu.be/x99R78fkSg0?si=LIt0i7W8UozWQ692.
- USB extension cables can be a problem. I’ve not had issues with standard USB to USB-C cables, but when I added a 3m USB to USB extension cable, even though it powered on the device, the device was not connecting via Wi-Fi to the home router.
- If your computer is not connecting to your radio for the firmware flash, one of the key reasons often is that a plain charging USB cable is being used. It must be an OTG data cable that is often used to communicate to phones. The other reasons can be the USB serial driver needed to be installed on Windows, and only the Chrome/Edge browsers support the USB serial interface.
- Only enable “Licensed amateur radio” in user settings if you are using an amateur radio frequency, as this will disable encryption (to comply with amateur radio regulations).
- Status message – there is no field for it, but you can add extra text to your user long name in the app’s user config (up to 39 characters including emojis). It has the advantage of beaconing every 15 mins or so, so everyone sees it. It’s another way too of ensuring a short message gets received.
- Trying to improve range https://youtu.be/V3f-Y3EfsBU?si=Ja5mKiIeTXCXcETC
- To read the most recent Meshtastic messages sent via msh/ZA without a radio you can visit https://www.qsl.net/zr1rf/msg.html
- There is an interesting implementation also of the Meshinfo application hosted at ZA Mesh at https://mesh.zr1rf.za.net/nodes.html.
- Activating MQTT is not really recommended, firstly because the limited free-to-air radio frequency can get swamped by excessive Internet traffic being rebroadcast, and secondly because it is no longer radio-only communications as the Internet is used. BUT if you want your device to appear on the Meshtastic map, then you need to activate it. Rather use MQTT topic
msh/ZAinstead of the defaultmsh, and activate the Uplink/Downlink only for the channels you want synced via MQTT. This will then filter to showing just other South African nodes that have set this topic, and not the whole worldwide MQTTmshtopic.
